
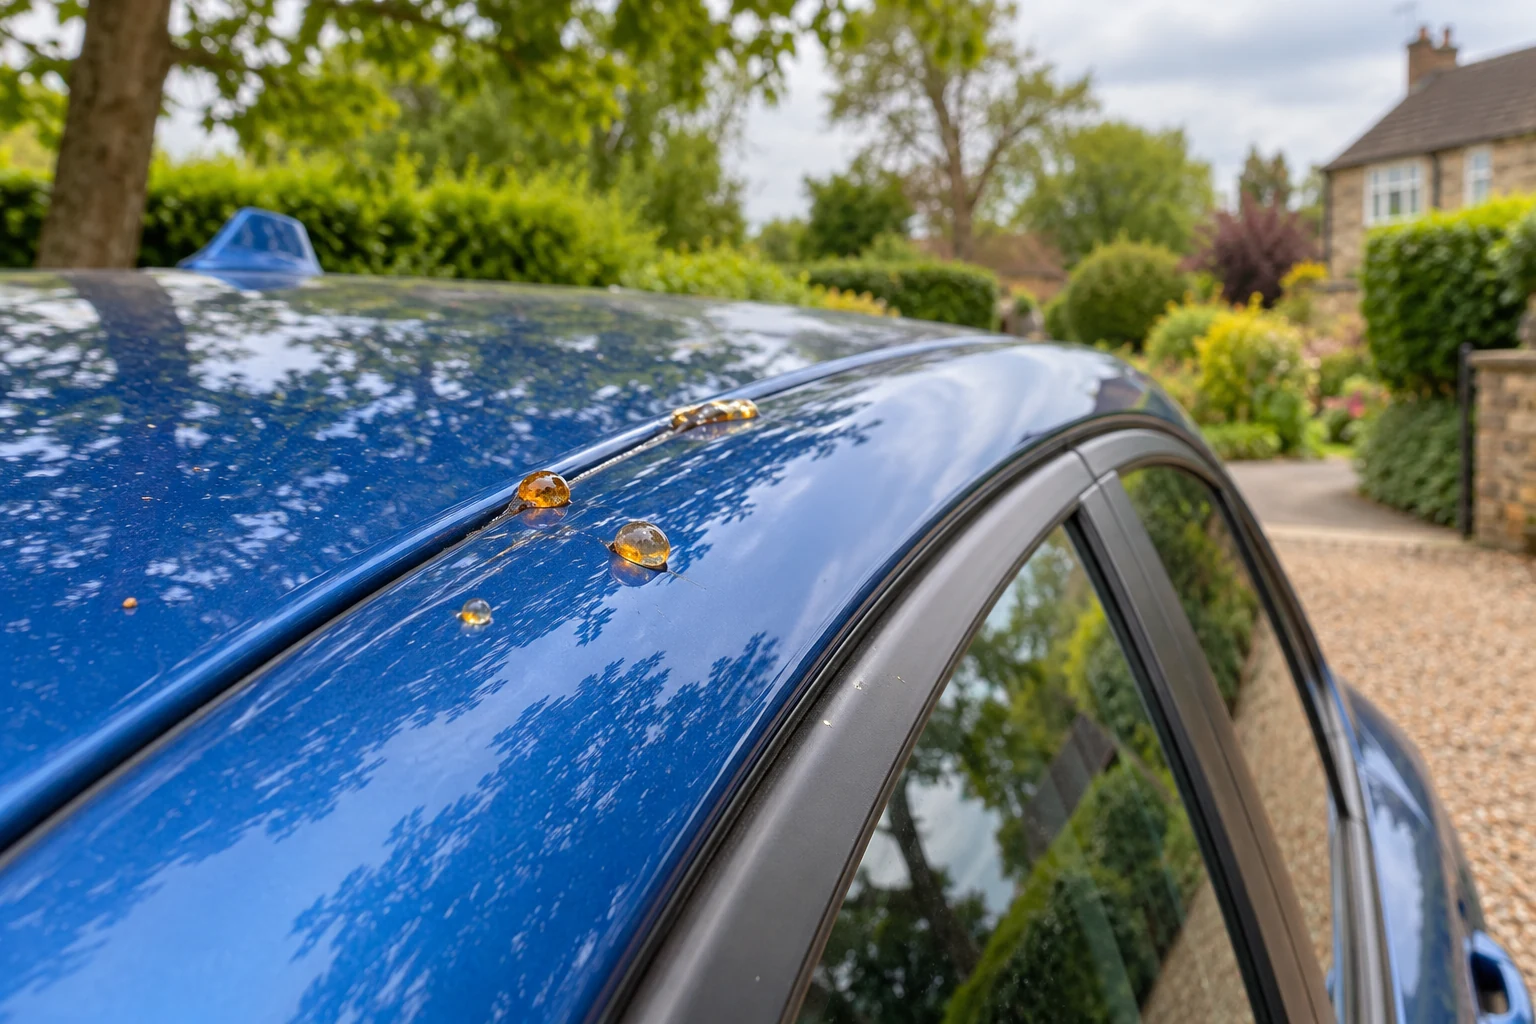
Identify the sticky problem before escalating treatment
“Tree sap” is a convenient label for several deposits. Resin beads can sit as hardened raised spots, while honeydew can leave a fine sticky film that attracts dust. Leaves, pollen and other contamination may be present at the same time. A cleaner appropriate for one observation is not automatically the right response to every mark beneath a tree.
Start with the finish and condition: is this intact conventional gloss paint, a wrap, film, matt surface or a recent repair? Check the relevant care instructions before selecting a chemical. A small area can still be damaged by an unsuitable product or hard scraping.
If the deposit is on cracked, lifting or otherwise compromised material, seek advice before trying to remove it. The goal is controlled cleaning, not proving that a stronger solvent can dissolve something.
| Observation | Useful starting point | Reason to pause |
|---|---|---|
| Fine sticky film with loose dust | A compatible gentle rinse and wash | Do not dry-wipe dust through a tacky film |
| Raised hardened amber or clear spots | Wash first, then assess a dedicated compatible treatment | Do not pick off with a blade or nail |
| Sticky residue beside trim or film edges | Check all adjacent materials before product choice | Overspray or cloth transfer can reach excluded surfaces |
| No raised material but an outline remains | Remove cleaning residue and inspect the finish | More solvent may not address a paint blemish |
Step 1: wash away the easy material
Choose suitable conditions on cool paint, out of direct sun where the product instructions require it. Rinse away loose dirt before contact, then use the vehicle’s permitted wash process. Give a soluble film a reasonable opportunity to soften instead of attacking individual spots with a dry cloth.
Use the correct shampoo dose and keep clean tools separate from dirtier equipment. Gtechniq GWash is one ordinary-wash option for compatible finishes. The important function here is removing loose dirt and washable contamination before judging the remaining sap.
A standalone bucket-wash shampoo
Gtechniq GWash 500ml
A concentrated, pH-neutral shampoo for a regular contact wash. A useful single-bottle choice when you already own a mitt and towels and do not need another boxed set.
- 500ml concentrate
- Bucket-wash shampoo
- pH-neutral formulation
Use the dilution on your UK bottle. This is GWash, not Ceramic GWash or a snow-foam pre-wash; follow your coating or finish supplier’s care instructions.
Follow the allowed water temperature; do not pour boiling water over paint or glass as a shortcut. If a spot remains, inspect rather than repeatedly forcing the wash mitt over it. A normal wash and a targeted sap treatment have different purposes.
Step 2: choose a permitted targeted treatment
SONAX Tree Sap Remover is a dedicated option with a cloth-applied method. The manufacturer directs washing first, shaking the can, testing discreetly and putting product on a suitable soft cloth before carefully treating the stain. It excludes hot surfaces, acrylic and Plexiglas.
Those exclusions matter around adjacent glazing and mixed materials. Ordinary vehicle glass is not the same as every transparent plastic. Confirm the surface and keep the cloth’s wet edge away from materials the product does not permit.
For a dedicated cloth-applied sap treatment
SONAX Tree Sap Remover 400ml
An aerosol for tree sap and other organic residues on compatible exterior surfaces. SONAX directs washing first, testing discreetly and applying the remover to a suitable soft cloth.
- 400ml aerosol
- Apply to a suitable cloth
- Material test required
Do not use on hot surfaces, acrylic or Plexiglas. Check paint, film and repair instructions, control transfer to adjacent materials and follow the aerosol’s handling directions.
Do not infer wrap, PPF or repair approval from a general exterior-surface statement. If the product and finish guidance cannot be reconciled, ask the supplier before use. An inconspicuous test is part of the process, not permission to disregard an explicit exclusion.
Step 3: use a tar-removal route only where supported
Autoglym’s sap advice identifies Intensive Tar Remover as a possible treatment for harder deposits after washing. That is a specific supported use, rather than a rule that every tar remover treats every resin. Follow the received product’s instructions and test the actual finish.
Its exterior application method uses a clean cotton cloth, then removal of loosened material. Avoid substituting a rough paper product or an applicator loaded with another chemical. Keep different treatments separate and complete one before considering another.
For targeted tar spots with a cloth method
Autoglym Intensive Tar Remover 500ml
A dedicated tar-removal liquid for suitable paintwork. The exterior method uses a clean cotton cloth and a one-to-two-minute contact period before wiping or washing away the loosened residue.
- 500ml liquid
- Clean cotton-cloth method
- One-to-two-minute exterior contact
Use the received directions and test compatibility. It can remove wax; do not infer suitability for every repair, film or plastic. The maker’s FAQ excludes interior plastics despite broader promotional wording.
Solvent treatment can affect a protective wax layer. Once cleaning is complete, assess whether an appropriate protection step is needed, using the protection maker’s preparation method. Do not conceal incomplete cleaning beneath a new wax or sealant.
Step 4: watch the deposit and the surface separately
Work on a controlled small area. You are looking for the deposit to soften and transfer through the permitted process, while the underlying surface remains unchanged. Use a clean cloth face and remove residues as directed.
Stop if colour transfers unexpectedly, the finish becomes sticky, the appearance changes or a film edge lifts. Do not assume that another pass will resolve a material reaction. Record the product used and ask the finish supplier or a suitable specialist for advice.
If the deposit does not respond within the supported method, pause and identify it again. Adhesive, overspray, hardened resin and paint damage can look similar at a glance. More pressure or a mixture of cleaners is not a reliable diagnostic tool.
Where clay fits, if it is appropriate
A clay bar or polymer decontamination tool may lift certain bonded residues, but it adds mechanical contact and can introduce marring. It should be considered only on a suitable clean finish with the correct lubricant and a reason to use it.
Do not treat an isolated sap spot as a reason to clay every panel. Follow the clay-bar guide for inspection, lubrication and stop decisions. Avoid using a solvent tar remover as clay lubricant unless the exact system explicitly permits it; chemical compatibility cannot be guessed.
Assess the clean result and reduce repeat exposure
If the deposit proves to be road tar rather than sap, use the tar-remover buying guide and the tar-removal method. Do not transfer a product’s approval from one identified deposit or surface to another.
After the deposit and cleaner residue are removed, inspect the surface under useful light. A remaining outline is not automatically more sap. If the finish is marked, use the assessment guide rather than repeatedly cleaning the same patch.
Where practical, avoid prolonged parking under trees associated with deposits. Check the car and deal with fresh sticky film before it becomes a larger hardened problem. Maintain a compatible protective finish as part of ordinary care, while recognising that protection does not prevent every deposit or guarantee damage-free removal.
Common questions
Is every sticky deposit under a tree the same kind of sap?
No. The term can include tree resins and sticky honeydew associated with insects. Their behaviour differs, so a gentle compatible wash is a useful first step before deciding a remaining hardened spot needs specialist treatment.
Can I use hand sanitiser or nail-polish remover on sap?
Do not adopt household-solvent shortcuts for an unidentified finish. They can affect paint, plastics, rubber and protective layers. Use a product intended for the job and actual surface, with the required compatibility test.
Will tar remover also remove tree sap?
Some products have relevant manufacturer guidance, but the category name alone is insufficient. Autoglym discusses its Intensive Tar Remover for harder sap deposits. SONAX offers a dedicated sap remover with its own application method and exclusions.
Should I clay the sap off first?
Mechanical treatment should not be the automatic first step. Wash and identify the deposit, then consider a compatible targeted cleaner. Clay can mar paint and needs the correct lubrication and finish approval if suitable contamination remains.
Why is there still a mark after the sticky material is gone?
The remaining appearance could be residue, staining or damage in the finish. Clean and inspect through the permitted method before deciding. Do not continue rubbing a clean area or assume polish will restore damaged lacquer.
Sources and product instructions
Follow the label and care instructions for the exact version and surface you own.