
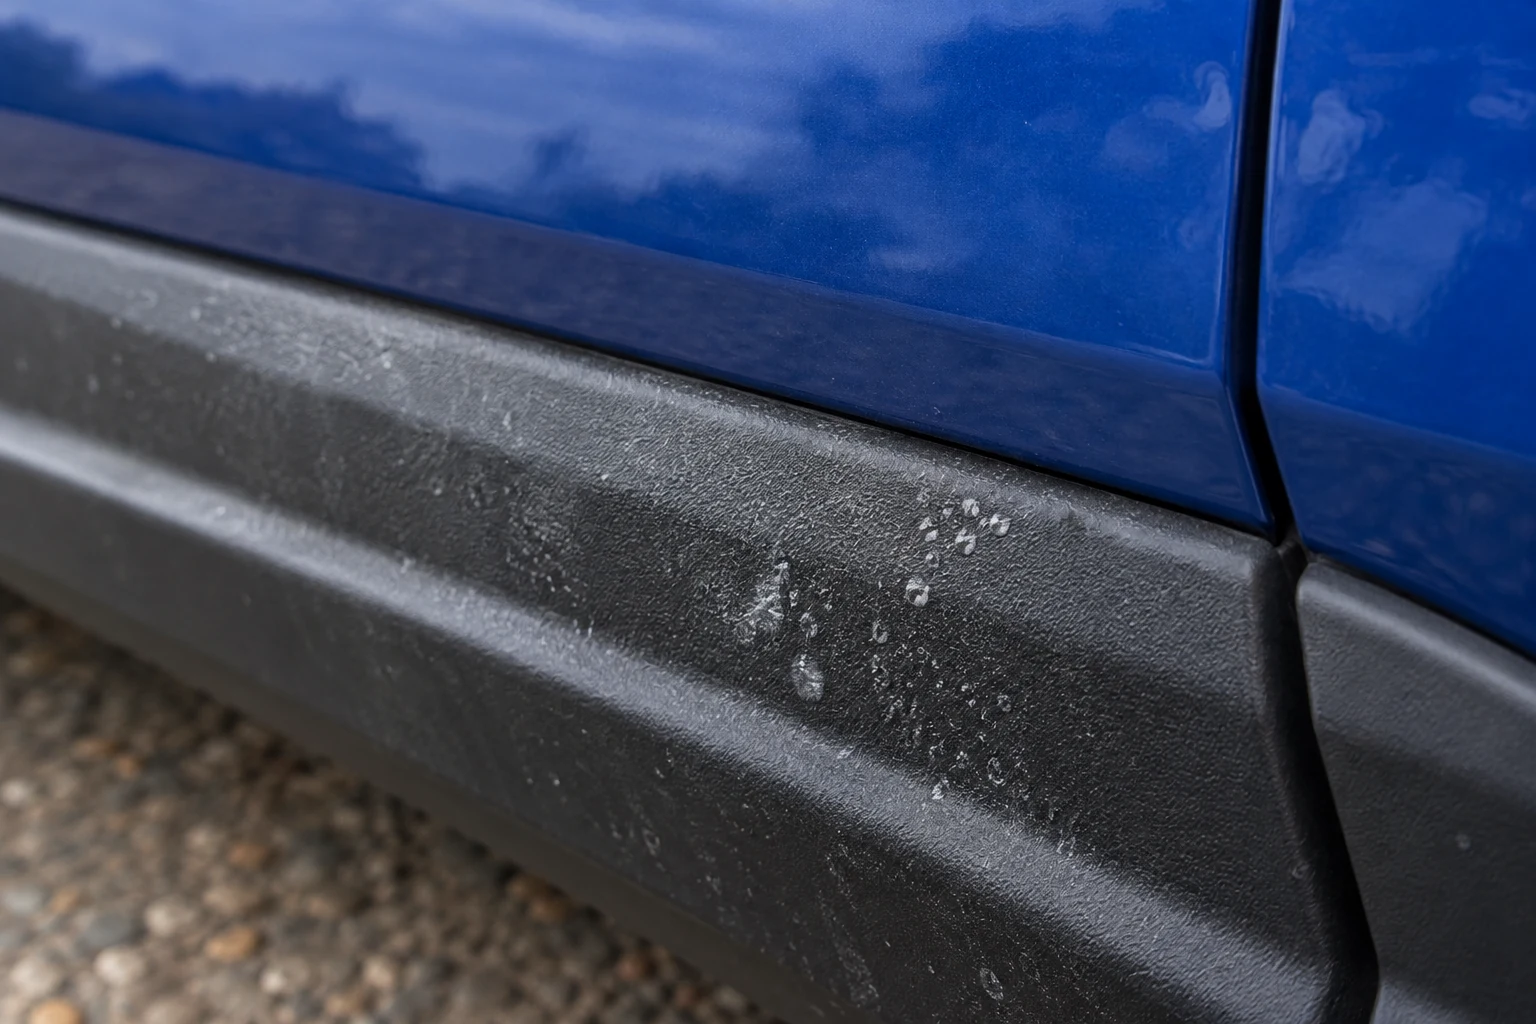
Confirm that the white mark is product residue
White marks on black trim often become noticeable after polishing or waxing nearby paint. They may sit in the texture or follow the edge of a panel. That history is useful, but colour alone is not a diagnosis: faded plastic, cleaner residue, mineral deposits and damaged material can also look pale. Start with an ordinary compatible wash and inspect the trim dry.
Establish the material before applying anything else. Textured unpainted bumper plastic is different from a painted or gloss-black part, a rubber moulding or an applied film. Use the vehicle and finish instructions for the actual surface. If the mark is on a roof seal, follow the roof guidance rather than borrowing a bumper-cleaning method.
Do not treat this as a reason to use household solvents, abrasive erasers, stiff brushes or heat. The useful first chemical choice is one whose maker supports the residue-removal job on the identified material. If the plastic is cracked, peeling or brittle, a cleaning product cannot establish that the surface is sound.
Choose a supported local treatment
Autoglym specifically lists Fast Glass for removing polish, wax and sealants from unpainted rubber and trim. That makes it a more relevant starting option for this defined job than assuming a general degreaser or a dressing will remove the deposit. The vehicle’s narrower restrictions still apply, and you should follow the cleaner’s directions and test discreetly where appropriate.
For a separate glass-cleaning job
Autoglym Fast Glass 500ml
A 500ml cleaner for interior and exterior glass, without abrasives, waxes or silicones. Useful when you need a glass cleaner but already own the rest of your wash kit.
- 500ml spray
- Interior and exterior glass
- No abrasives, waxes or silicones
Use dedicated clean cloths. Check tint-film and vehicle-screen guidance; apply to the cloth for compatible displays, never spray directly onto electronics.
A glass cleaner having this supported secondary use does not mean every glass cleaner removes wax from every plastic. Nor does it make a glass-polishing cream an interchangeable substitute. Keep the exact product identity clear, especially when bottles from one range look similar.
Prepare clean cloths and a small working area
Work on cool trim after loose dirt has been washed away. Have a clean suitable cloth for the treatment and a separate finishing face or cloth. Control the application around adjoining paint, glass and seals, rather than soaking a long strip of trim at once. A small area makes it easier to see whether the deposit is actually being lifted.
A fine SONAX Microfibre Cloth PLUS is one cloth option for compatible plastic. If it is used for wax residue here, dedicate it to this task and clean it before reuse. It should not go straight back to finishing a windscreen, where transferred wax or dressing can create a new smear problem.
For a dedicated cloth on compatible plastic trim
SONAX Microfibre Cloth PLUS Interior & Glass
A single 40 × 40cm fine microfibre cloth for glass, mirrors and plastic surfaces. Use damp for cleaning and a separate dry face or cloth for finishing as the job requires.
- One cloth
- 40 × 40cm
- Item 04165000
Dedicate this cloth to the task. A cloth that has collected wax residue or trim dressing should not be used to finish a windscreen; inspect and clean it before reuse.
Before starting, keep the diagnosis simple:
- Is there a recent wax, polish or sealant application that explains the mark?
- Is the part definitely unpainted trim approved for the selected cleaner?
- Has ordinary wash residue been rinsed away?
- Is the material intact, rather than cracked or peeling?
- Can you complete the small treatment and inspect it dry in consistent light?
If the answers are uncertain, pause the chemical step and obtain the relevant finish advice. A visible pale patch is not a useful reason to keep increasing cleaner strength until something changes.
Remove residue with controlled passes
Follow the Fast Glass directions for a light application, working with a clean suitable microfibre and turning to a fresh face as residue transfers. Keep the work local so you can control where the cleaner goes. Do not grind a dry wax-filled cloth repeatedly into the same texture.
On a narrow edge, use the clean cloth in a manageable fold. Avoid forcing tools behind a moulding or pulling the part away from the car. If you cannot reach the residue without aggressive probing, seek advice rather than treating the gap like a drain that needs clearing.
Finish by removing the cleaner and loosened material as directed. Use a clean face for this stage, then allow the surface to become dry enough for a fair inspection. A wet patch may look temporarily darker even when material remains in the texture. That is why the dry inspection belongs before any dressing.
Repeat only a controlled permitted pass where residue is visibly reducing and the material remains unchanged. Stop if the surface becomes tacky, transfers colour unexpectedly, changes sheen or shows damage. Do not invent a longer soak or stronger mixture to force progress when the product method is no longer producing a clear improvement.
Decide what the remaining mark means
| Result | Interpretation to check | Next step |
|---|---|---|
| White deposit reduces and transfers to the cloth | Residue removal is progressing | Complete the permitted local method, then inspect |
| Mark looks dark only while wet | Residue or weathering may remain | Assess dry before any dressing |
| No improvement after the supported method | Cause or compatibility may be different | Ask a trim/finish specialist; avoid stronger improvised solvents |
| Cracking, peeling or surface damage is visible | Material condition needs assessment | Consider repair advice rather than more cleaning |
A persistent pale area does not automatically mean more wax remover is needed. It may be weathering, an uneven previous treatment or damage. Describe the recent products and methods to a professional if you need help; that is more useful than applying several unrelated chemicals and then trying to identify which one altered the finish.
Dressing comes after residue removal
Once compatible plastic is clean and dry, an optional dressing may suit the desired finish. Autoglym Bumper & Trim Gel is one ready-to-use option, using a suitable applicator and excess removal. It is listed here for that later role, not as evidence that the white residue underneath has been removed.
For a ready-to-use exterior-trim dressing
Autoglym Bumper & Trim Gel 500ml
A silicone-containing gel for compatible unpainted exterior plastic and rubber. Apply to clean dry trim with a suitable foam applicator, spread evenly and buff away excess.
- 500ml ready-to-use gel
- Clean and dry first
- Buff off excess
A dressing changes appearance; it is not a permanent repair for degraded plastic. Keep away from glass, controls and tyre tread. Do not infer approval for every roof or door seal.
If the mark is only hidden after dressing, keep that distinction in mind. Do not describe a darker appearance as a permanent repair. Use the trim-dressing buying guide to compare compatible products and their complete methods. Keep dressing off glass, tyre tread, brakes and controls, and do not extend it to roof seals without permission.
Prevent the same residue returning
When waxing or polishing paint beside trim, use the paint product’s permitted application controls and work in manageable sections. Keep the applicator away from unpainted texture and remove accidental transfer promptly by the supported method. If masking is part of the chosen process, use only suitable materials and removal methods permitted for the finish.
Store paint-finishing and trim-cleaning cloths so their roles remain obvious. Check nearby edges after the paint stage, before dressing the trim, so residue is not covered and forgotten. At the next wash, assess any returning pale mark dry and trace possible runoff or trapped residue. Prevention and a clear cleaning sequence are more useful than adding a stronger trim chemical to every routine.
Common questions
Can glass cleaner remove wax from black trim?
Some have a supported secondary use. Autoglym specifically lists Fast Glass for polish, wax and sealant residue on unpainted rubber and trim. Do not extend that to every glass cleaner or override vehicle restrictions.
Will trim dressing remove the white stain?
It may darken or mask the appearance without removing the deposit. Clean and inspect the dry trim first. Dressing is an optional later stage on compatible material, not proof of residue removal.
Should I use a stiff brush or abrasive eraser?
Do not make an aggressive tool the default. Identify the material, use a supported cleaner and clean suitable cloth, and stop if the deposit does not improve. Abrasion can change the trim’s texture or sheen.
Why does the mark disappear when wet and return when dry?
Water can temporarily darken the appearance of plastic. Remaining residue or weathering may still be present. Judge the dry surface in consistent light before repeating treatment or applying dressing.
What if the cleaner does not remove the mark?
Reconsider whether it is wax residue, weathering or damage. Seek advice for the specific finish rather than progressing through household solvents, longer soaks or heat. Cracked or peeling material needs repair assessment.
Sources and product instructions
Follow the label and care instructions for the exact version and surface you own.