
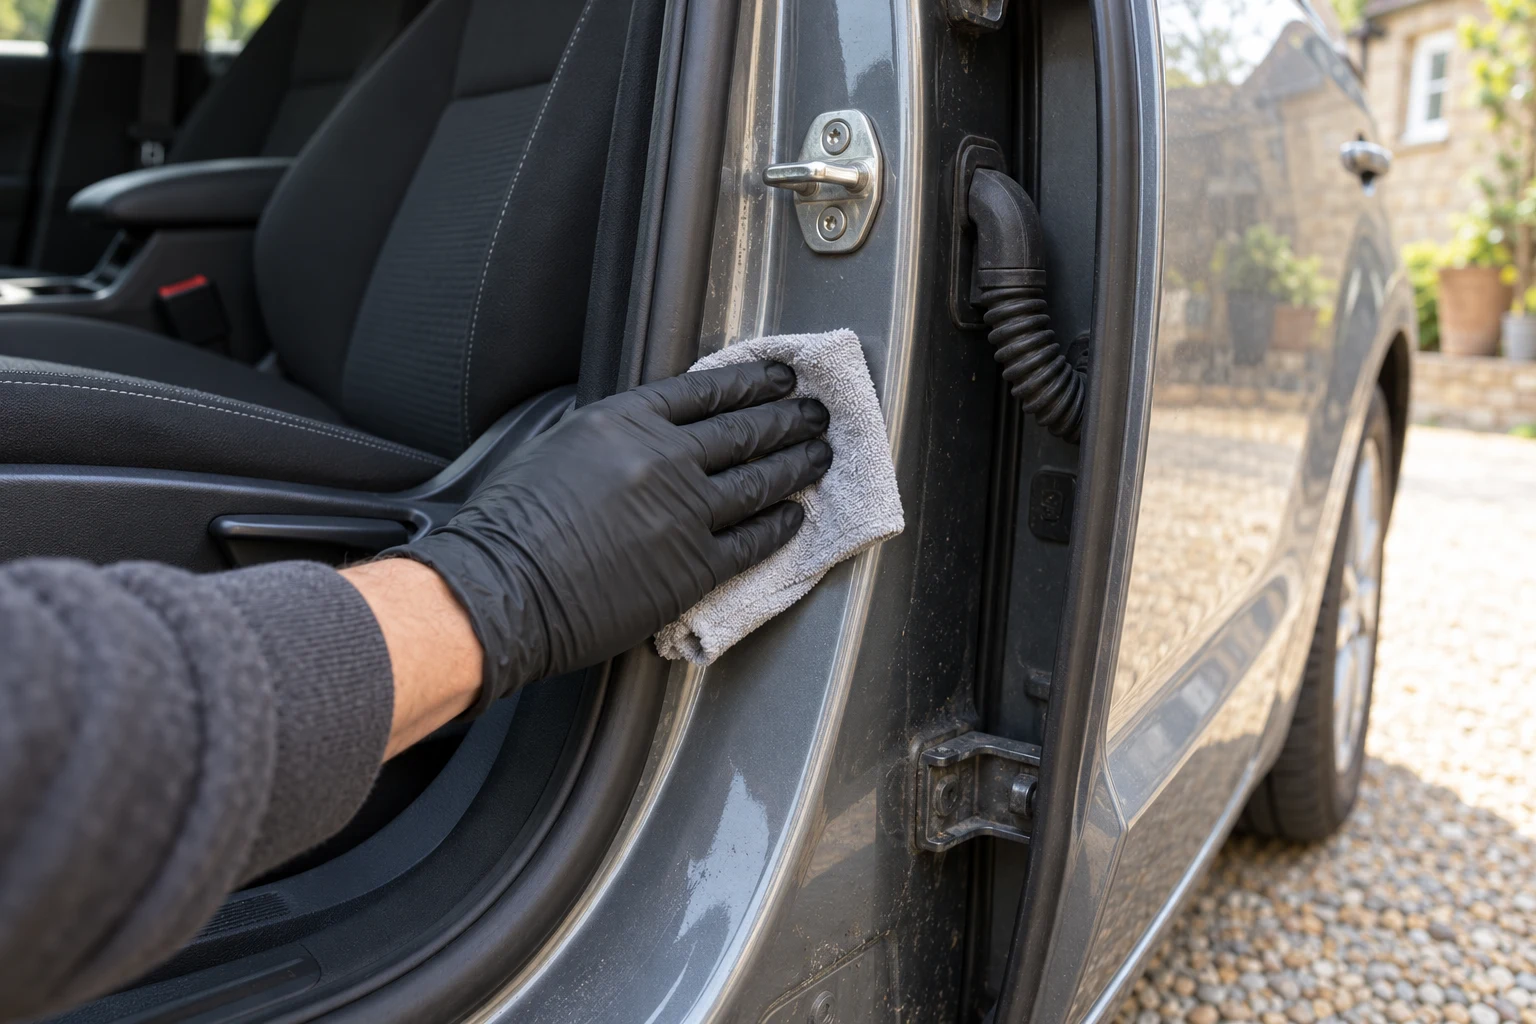
Separate the painted opening from the mechanisms
Door shuts collect road dust, shoe marks, rain drips and residue from exterior washing. The visible painted ledges are usually straightforward to maintain, but the same opening also contains seals, hinges, locks, electrical boots and trim. Those parts should not all receive the same cleaner and brush.
Begin by checking the vehicle’s care instructions. Material restrictions vary, and repaired paint, protective film or aftermarket trim can add further limits. A general exterior-cleaning permission does not mean that a chemical can be sprayed into every recess of an open door.
The aim is to clean accessible permitted surfaces while keeping the cabin and functional components dry. Treat a corroded hinge, damaged wiring boot, failing latch or persistent leak as a maintenance problem. Stronger cleaning and more water are unlikely to be the right diagnosis.
Gather a small separate kit
Use clean cloths reserved for these dirtier ledges rather than immediately reusing them on the bonnet. Have a container for dirty media and a separate cloth for drying. Protect adjacent interior surfaces from drips using a suitable clean absorbent cloth, without trapping it in a latch or closing door.
A purpose-made rinseless wash can support a controlled wiping method on compatible painted areas. The selected blue Optimum No Rinse Wash & Shine concentrate needs its washing dilution, not a stronger unrelated spray recipe. Check the received bottle and the finish before mixing.
For a measured bucket-based rinseless wash
Optimum No Rinse Wash & Shine 946ml
A single 946ml bottle of the blue Wash & Shine rinseless concentrate. Used with the specified water mixture and clean wash media, followed by drying each completed section.
- 946ml single bottle
- Blue Wash & Shine concentrate
- Water dilution and separate drying required
Check the received revision and directions. This is not the green Wash & Wax or yellow Opti-Coat formula. Heavy mud and grit need bulk removal first; no universal permission for specialist finishes, displays or interior assemblies.
Only prepare the amount you can manage cleanly. A measured solution makes repeatable use easier, but the bucket is not an invitation to pour liquid through the opening. Wet the cloth and control its moisture; put the product where you intend to wipe rather than letting it run towards a mechanism.
Work with the car safely positioned
Park securely with enough room to open and support the door as intended. Avoid working where wind or passing traffic could move it unexpectedly. Allow hot surfaces to cool and keep the ignition and vehicle systems in the condition required by its care instructions.
Keep windows and the rest of the vehicle arranged to prevent accidental interior wetting. Do one opening at a time so that loose equipment does not accumulate across several seats. Keep children and pets away from the working area and open-door space.
Look before introducing liquid. Identify the painted ledges you can reach, the carpet edge, seals, exposed electrical fittings and grease-bearing points. If the surface or component is uncertain, leave it until the correct method is established.
Lift loose dirt without grinding it in
Start with loose dust and debris on accessible areas. Use an appropriate gentle removal method that does not drag gritty material across paint or blow it deeper into the opening. Keep vacuum nozzles from scraping painted edges and avoid pushing debris into unidentified slots.
Do not start by pressing a dry towel through accumulated grit. If deposits cannot be lifted using the permitted controlled method, reassess them rather than scrubbing around a narrow edge. Heavy contamination may require a different vehicle-approved approach away from the cabin.
Check the cloth as you work. Dirt transferred from the lower sill should not be carried onto cleaner upper paint. Keep this stage separate from exterior wash media and from cloths used on leather, screens or glass.
Wipe small painted sections with controlled moisture
Fold a clean cloth to expose a manageable face, wet it with the suitable solution and control drips. Work a small accessible section with light passes. Turn to a clean face when the current one becomes dirty and replace the cloth rather than trying to spread one dirty patch around the whole aperture.
For a supply of separate clean plush cloth faces
The Rag Company Eagle Edgeless 500 — blue four-pack
Four blue 16 × 16in plush edgeless microfibre towels, specified as 500gsm and a 70/30 blend. Useful for permitted rinseless or waterless methods with frequent changes to clean faces.
- Four blue towels
- 16 × 16in / about 41cm square
- 500gsm / 70:30 blend
A four-pack is a starting supply, not a guaranteed whole-car allowance. Wash and inspect before use, keep dirty cloths separate and follow textile care. Plush fibres do not make trapped grit harmless.
The selected Eagle Edgeless 500 pack provides four blue square cloths. Their plush construction is useful only while the fibres remain clean and suitable for the job. Keep cloths that collect grease or abrasive dirt out of the paint-washing supply, even if they came from the same pack.
Respect the cleaner’s finishing method. A permitted rinseless routine differs from an ordinary cleaner that requires removal with a separate damp cloth or rinse. Do not leave a cleaner behind merely because the narrow space makes a conventional rinse inconvenient.
Use a soft brush only where it adds control
A small soft detailing brush can help around an accessible painted recess where a folded cloth cannot conform easily. Apply the permitted cleaner in a controlled way and keep agitation light. Follow with a clean cloth so that loosened dirt is actually removed rather than redistributed.
For light dust and small interior details
Detail Factory Ultra-Soft Detailing Brush Set
Two grey-handled synthetic detailing brushes in different sizes. Their soft bristles and metal-free construction suit controlled light-duty work around compatible interior details.
- Two brush sizes
- Synthetic bristles
- Metal-free construction
Follow vehicle care before brushing delicate trim or displays. Grit and hard-part contact can still mark a surface; this is not a carpet-scrubbing set or a scratch-free guarantee.
Keep the brush away from essential grease, latch internals, electrical connectors, wiring boots and unidentified drain openings. A soft brush does not make those areas safe to saturate. Do not force bristles under trim or into a seal channel to chase a hidden mark.
Reserve the brush for its assigned task and clean it according to its instructions. A brush previously used around greasy mechanisms should not later be promoted to delicate dashboard work because it looks dry. Separate storage makes that distinction easier to maintain.
Leave seals and lubrication on their own care paths
Wipe permitted seals according to the vehicle’s instructions and the dedicated rubber-seal guide. Avoid assuming that a paint cleaner, alcohol product or dressing is appropriate. Some vehicle instructions explicitly restrict harsh chemicals and coatings on seals.
Do not remove grease simply because it looks untidy. Hinges and latches perform a mechanical task, and their lubrication can be deliberate. If dirty grease needs servicing, obtain the correct procedure and lubricant for the vehicle rather than following it with a generic dressing.
Likewise, do not spray into locks or electrical components. A routine cleaning guide cannot determine which connector or sensor assembly is sealed for a particular liquid exposure. Stay with surfaces whose identity and permitted care are clear.
Dry, inspect and put the kit away
Dry the cleaned accessible painted areas with separate clean media, paying attention to drips near the carpet and trim. Avoid inserting cloth into moving parts. Check that no towel, brush or cable remains in the opening before operating the door.
Look for persistent staining, lifting paint, torn seals or recurring pooled water once surface dirt has gone. These findings need the appropriate maintenance advice rather than repeated wetting. Do not probe a suspected blocked drain with improvised tools.
Separate used cloths by contamination, wash permitted textiles and clean and dry the brush. Keep this small door-shut kit distinct from the tools used on clean exterior paint. Regular controlled wiping is easier to manage than allowing grit and oily contamination to build up until aggressive cleaning seems necessary.
Common questions
Can I pressure-wash door shuts with the doors open?
Do not direct a pressure jet into open door apertures, seals, locks, wiring or interior trim. Use a controlled damp-cloth method for accessible permitted surfaces and follow the vehicle’s instructions.
Can rinseless wash clean door shuts?
A correctly diluted rinseless product can be useful on permitted accessible painted surfaces. Apply it through controlled wet media, not by flooding the opening, and do not extend that approval to seals, displays or lubricated mechanisms.
Should I remove grease from the latch?
Leave essential lubrication in place. Dirt around a mechanism is different from a painted ledge. If a latch is sticky, corroded or malfunctioning, use the vehicle’s maintenance instructions or seek service advice.
How do I clean rubber door seals?
Treat seals as a separate material-care task. Use the exact vehicle-approved method, often a damp cloth, and avoid assuming that a paint cleaner, solvent or dressing is suitable.
Can I clear a blocked drain while cleaning?
Do not push tools into unidentified holes, remove trim or dismantle drains as part of a routine wipe-down. Persistent water, blocked drainage or leaking needs the correct vehicle-specific procedure.
Sources and product instructions
Follow the label and care instructions for the exact version and surface you own.